
Editing Tools
All routing and annotation happens in the strand viewer with one active tool at a time. The tool row sits at the top of the strand viewer; each tool has a one-key shortcut and, for most tools, a side panel of options. Switching tools never changes your design; it changes what a click or drag does.
Use the interactive walkthrough below to try each tool on a sandboxed tutorial design, then read the reference for the details.
Export fallback: the toolbar contains pan, select, draw, break, skip, insert, paint, modification, and sequence tools. Select controls target filters; draw creates segments and crossovers; break creates nicks; skip and insert change per-base slot structure; paint recolors oligos; modification changes terminal chemistry; sequence assigns or clears bases.
Tool Reference
| Tool | Shortcut | Purpose |
|---|---|---|
PAN | hold Option / Alt, or ← ↑ ↓ → | pan the active canvas without changing the active tool (arrow keys pan the strand view only) |
SELECT | v | select ends, segments, oligos, crossovers, and region controls |
DRAW | n | create strands and crossovers |
BREAK | b | split an oligo at a base position (insert a nick) |
SKIP | s | add / remove skips (deletions) |
INSERT | i | add / remove insertions |
PAINT | p | recolor oligos |
MODIFICATION | m | apply or clear terminal modifications |
SEQUENCE | a | assign or clear sequences |
SPLIT_REGION | r | split one region into two between helix rows |
Tip
Every edit below is a single undoable step (Ctrl/Cmd + Z). When in doubt, try it and undo.
Tools with options open a floating tool panel on the right (Select, Paint, Modification, Sequence, Skip, Insert). See Interface Reference for moving and collapsing it.
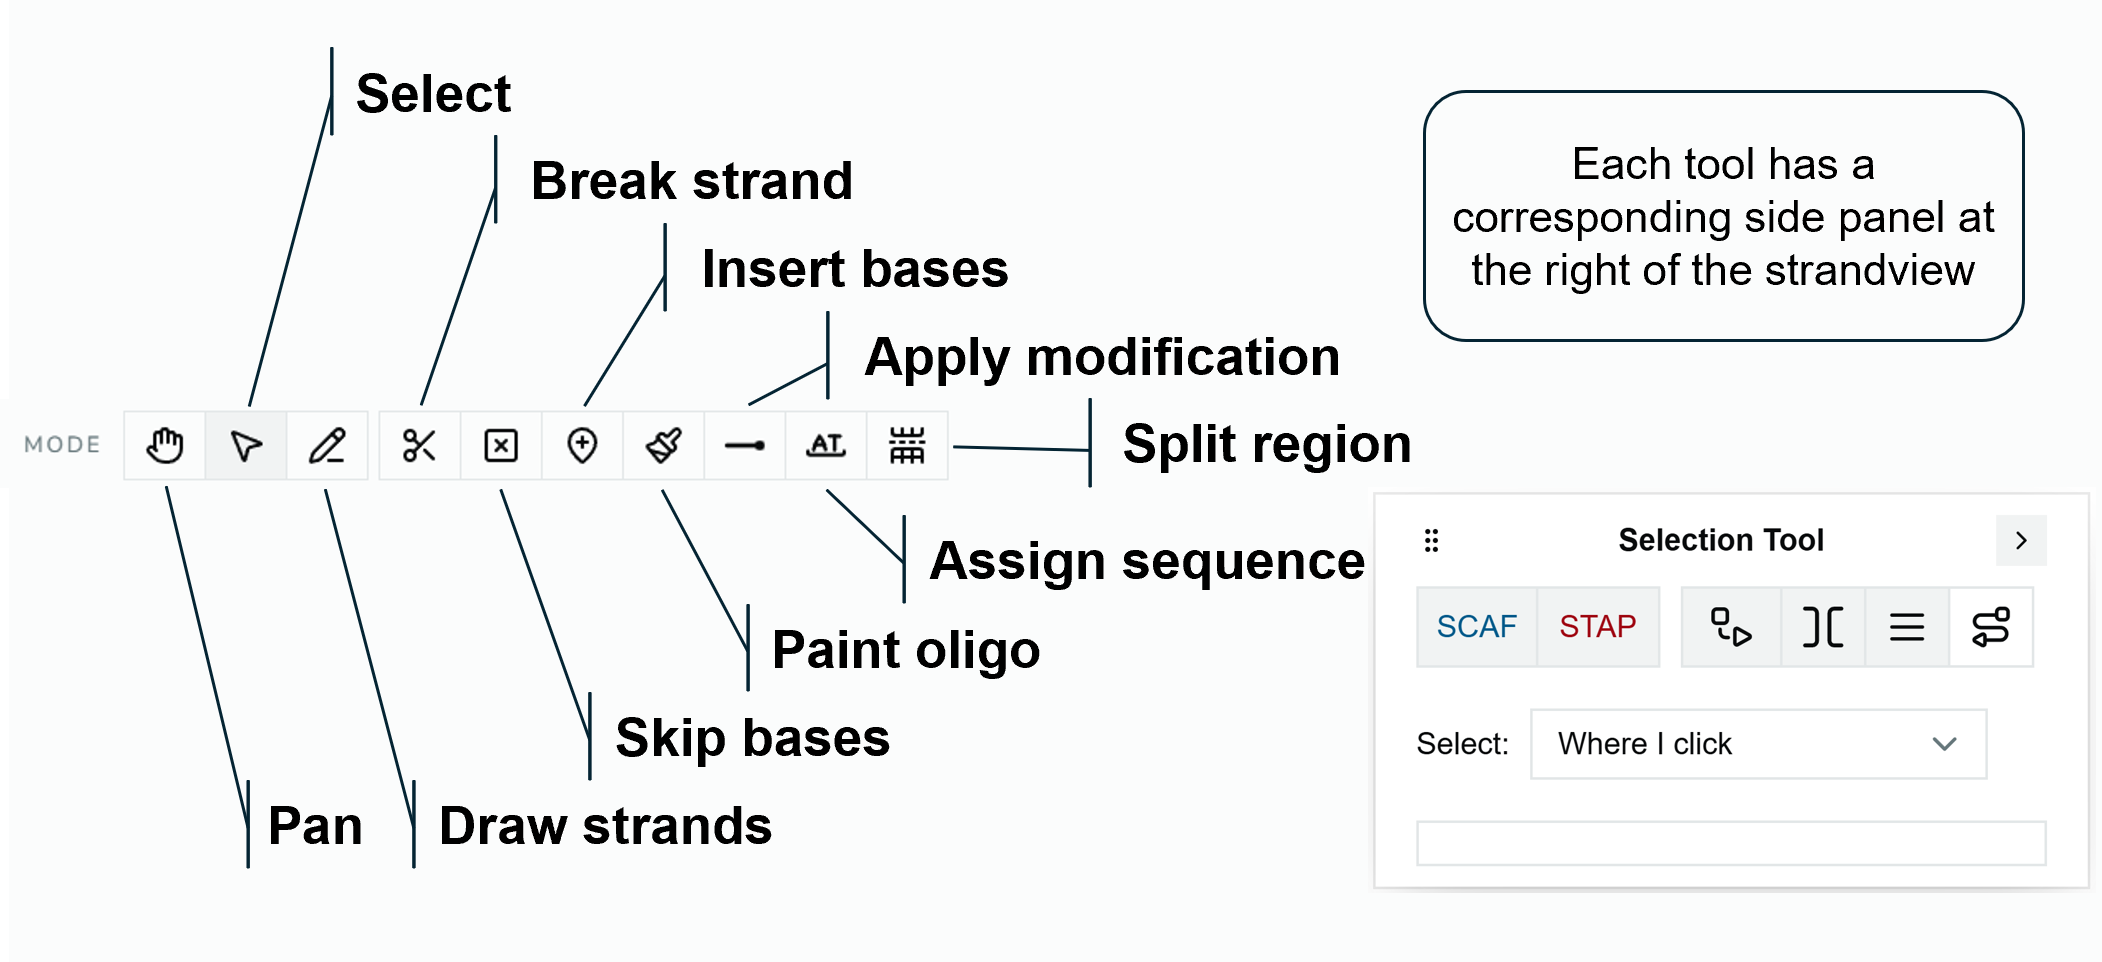
Strand-view tool row with each tool labeled (Pan, Select, Draw strands, Break strand, Skip bases, Insert bases, Paint oligo, Assign sequence, Split region), with the Selection Tool side panel open beside it.
Draw
Draw is how you lay down DNA and connect it.
- Drag across empty space on a strand row creates a new segment spanning the drag.
- Drag from an existing free end extends that strand.
- Drag between compatible endpoints or crossover sites creates a crossover.
Crossovers are directional and always go 3′ → 5′ (upstream 3′ end to downstream 5′ end). On lattice regions, crossovers can only land on constrained crossover sites; freeform regions allow any compatible end-to-end connection. If a drag wouldn't produce a valid connection, nothing is created.
Break
Click a strand position to split the underlying segment into two pieces, inserting a nick. The two halves keep their bases; the oligo they belonged to may split into two oligos depending on connectivity.
Skip / Insert
These edit the per-base slot structure of a segment, which changes its effective length without moving its endpoints.
- Skip (
s): click a position to mark a base as deleted; that position is removed from the emitted nucleotide path. - Insert (
i): click a position to add an extra base between neighboring slots. - Double-click a position to remove the skip or insert there.
Skips and inserts are applied to both strands of the helix at that position. They can't be placed on a strand end, or on a constrained crossover site (a warning explains why).
The Skip and Insert tools share one panel for the active region:
| Control | What it does |
|---|---|
| Apply to all VH in region | When on, a click adds the skip or insert at that base position on every helix of the active region; positions on crossover sites are skipped with a warning |
| Counts | The number of skips and inserts in the active region |
| Remove all skips / inserts (N) | Removes every skip (Skip tool) or insert (Insert tool) in the active region. Click once more on Confirm to do it. |
Skips and inserts directly affect sequence length and every simulation export (see Simulation And Export). Add them before finalizing sequence.
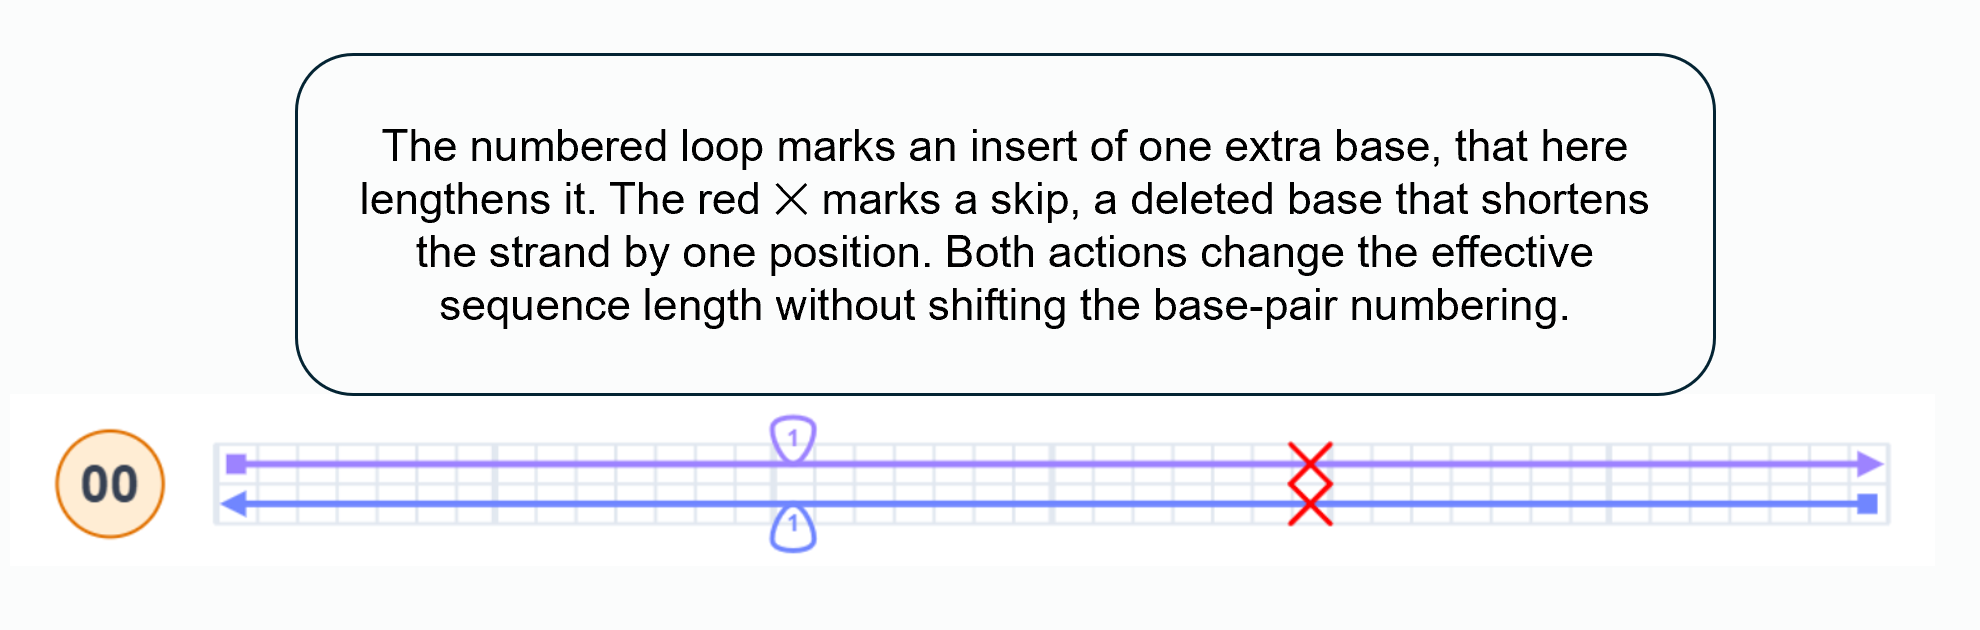
A segment showing an insert marker (numbered loop, one extra base) and a skip marker (red X, a deleted base).
The numbered loop marks an insert of one extra base, which lengthens the strand here. The red ✕ marks a skip, a deleted base that shortens the strand by one position. Both actions change the effective sequence length without shifting the base-pair numbering.
Paint
Paint recolors oligos with the panel's Active color. Clicking a color in the panel only makes it the active color; the paint is applied when you click in the strand view. There are two ways to use it:
- One oligo at a time. Switch to Paint (
p), pick a color, then click an oligo. Keep clicking to paint more oligos with the same color. - Many oligos at once. In Select mode (
v), select the oligos first (click,Shift+ click, or drag a marquee). Then switch to Paint (p), pick a color, and click anywhere in the strand view. Every selected oligo takes the color in one undoable step, and the selection is cleared. The panel shows how many oligos are selected.
Painting is purely cosmetic: it changes how the oligo is drawn in the strand and 3D views and does not affect topology or sequence.
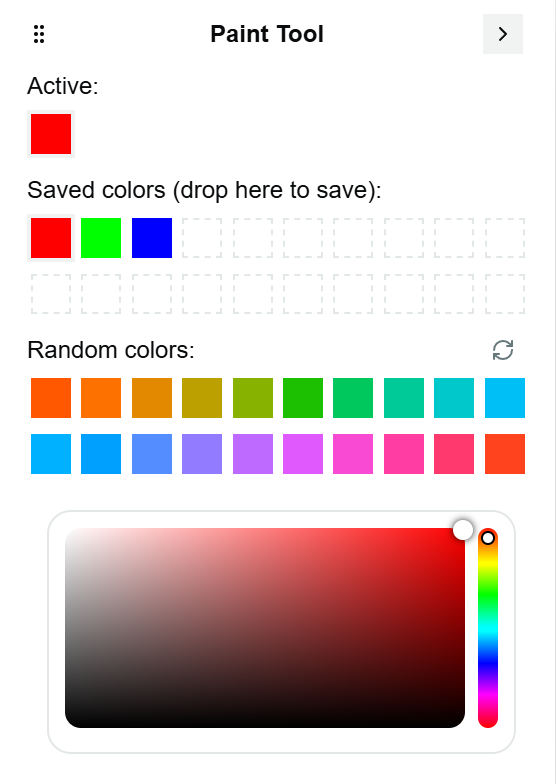
Paint panel open, showing active color, saved colors, random colors, and a custom color picker.
| Panel area | Use |
|---|---|
| Active | The color the next click applies |
| Saved colors | Click a swatch to make it active. Drag any swatch (including the active one or a random one) into this grid to save it. |
| Random colors | A row of suggestions; the refresh button generates a new set |
| Color picker | Pick any custom color |
Modification
Apply the currently selected terminal modification (for example a 5′/3′ chemical modification) to free ends:
- to a clicked free end, or
- to all selected free ends at once.
The panel shows the Active modification and lists:
- Builtin modifications (Thiol, Biotin, Cy3, Cy5), each with its marker color,
- Custom modifications for this design. Click +, enter a Name (for example
Azide), pick a Color, and click Add (or pressEnter). Hover a custom modification to show its ✕, which deletes it; if it's already used, a dialog says how many ends carry it and removes it from all of them when you confirm. - Remove mode: clicking an end then clears its modification.
Custom modifications are saved with the design. Modification sites can be surfaced later with the "with modifications" highlight (see Selection).
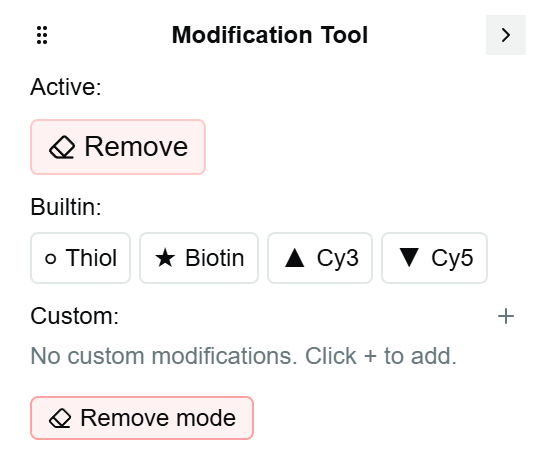
Modification panel showing the built-in modification list (Thiol, Biotin, Cy3, Cy5) and the Remove mode toggle.
Sequence
Assign or clear bases on clicked strands. What a click targets follows the SCAF / STAP and segment / oligo filter toggles at the top of the panel (c, t, d, o). When you fill a strand, its complementary strand is updated to match.
The panel also shows the scaffold sequence status (✓ or ✗ Scaffold Sequence, see below). Pick one of four actions:
| Action | Options |
|---|---|
| Random | GC Content (0 to 1, default 0.5) for the generated bases |
| Preset | Preset Scaffold Sequence: scaffold sequences of 4844, 7249, 7560, 8064, or 8634 bases |
| Custom | A text box for your own sequence |
| Remove | Click oligos to clear their sequences. Clear All Sequences clears the whole design (click Click Again to Confirm). |
After a fill, the panel reports how much of the input sequence was left over and how many bases were missing, so you can tell whether a preset scaffold was long enough.
Fill mode (radio group at the top of the panel) controls how an action interacts with bases that are already assigned:
| Option | Behaviour |
|---|---|
| Update the entire sequence | Overwrites all bases on the clicked oligo/segment, including already-filled ones |
| Fill only the empty parts | Skips positions that already have a non-N base; the input sequence is compacted into the empty slots in 5′→3′ order |
Tip
"Fill only the empty parts" is the safe choice when you've hand-assigned part of a strand and want to complete the rest without disturbing it.
Scaffold Sequence Indicator
The scaffold sequence indicator summarizes whether scaffold-labelled oligos have sequence coverage that still matches the current topology. A red state means the assigned sequence may be stale after a topology change (a moved end, new skip/insert, break, or reconnection shifted the nucleotide path). Grey means no oligo is marked as scaffold yet, so there is nothing to track; hover it for a reminder, and right-click an oligo and choose Set as Scaffold. The Sequence panel shows No scaffold set in the same case.
Warning
Treat red as a prompt to refill the scaffold sequence before exporting or ordering staples. This indicator only behaves meaningfully once an oligo is actually marked as scaffold (see Mental Model).
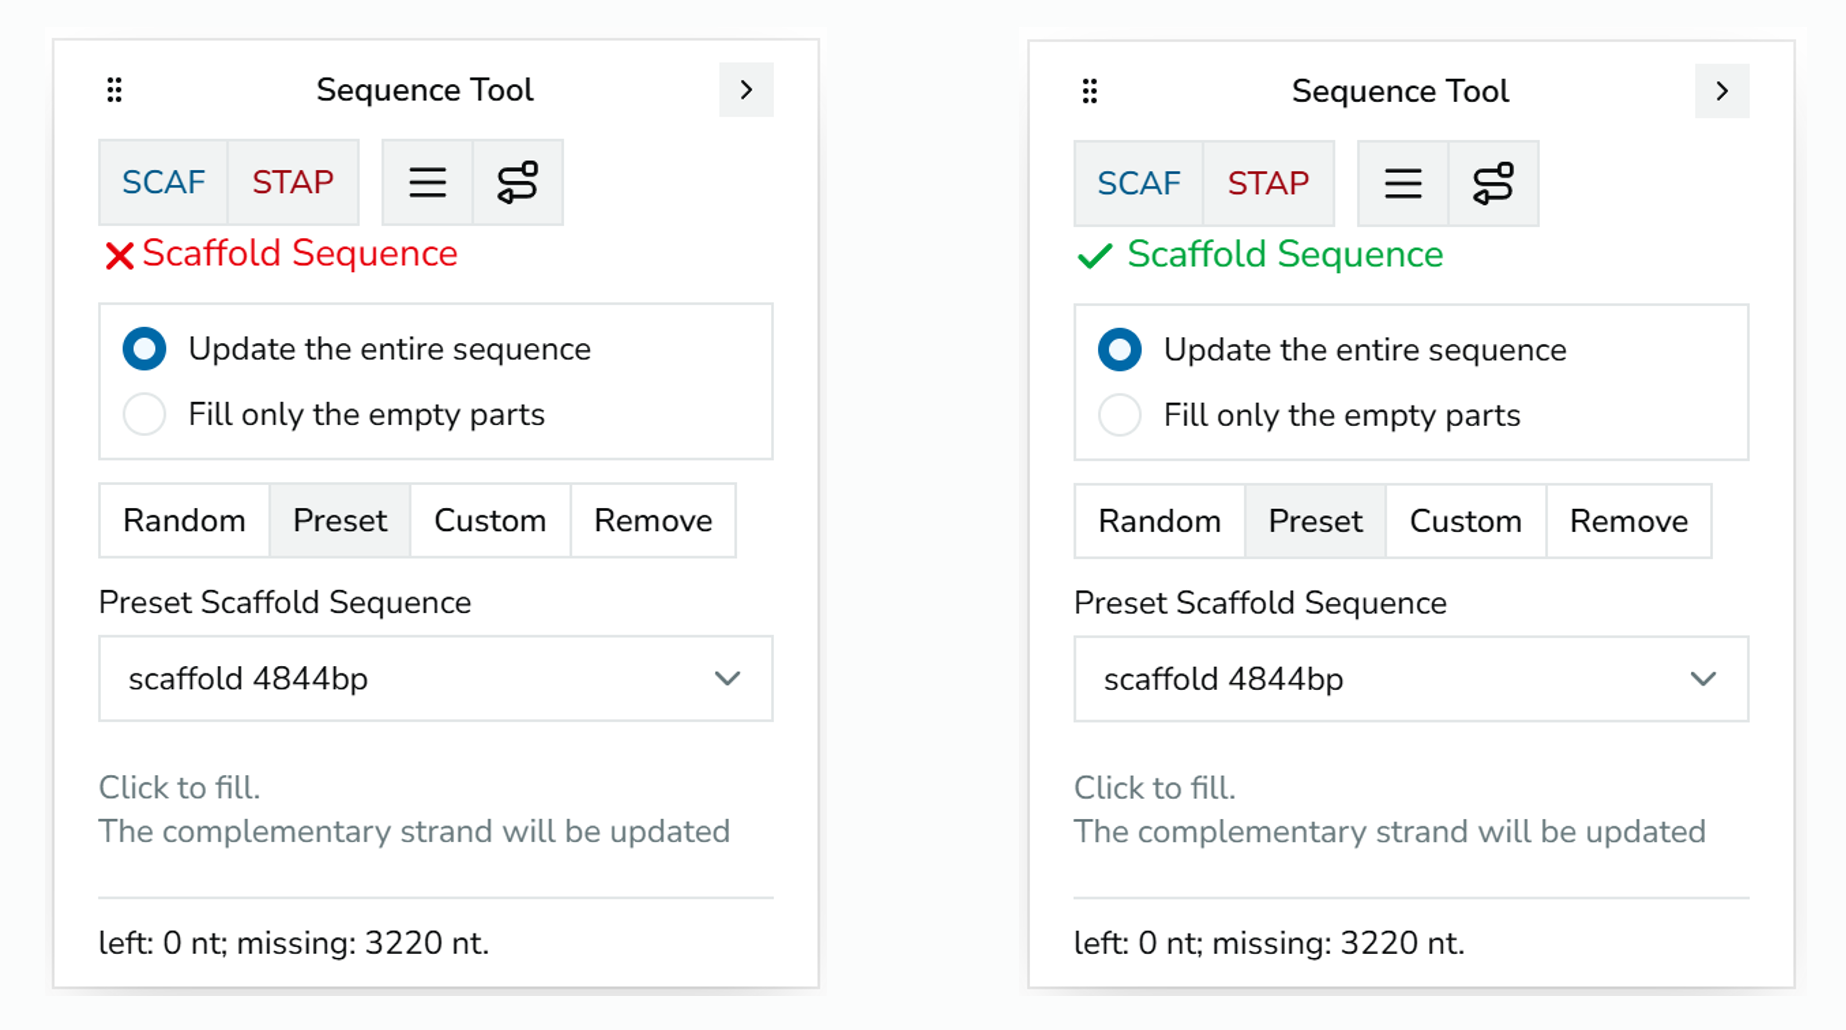
Scaffold Sequence indicator shown side by side in its red/stale state and its green/healthy state.
The same status appears as the S badge in the strand-view toolbar; click it to toggle the scaffold highlight.
Split Region
The Split region tool (r) divides one region into two between helix rows:
- Choose the tool. Move the pointer over the strand view; the gap between two rows of the same region nearest the pointer is highlighted, with the name the new region will get.
- Click to split. The rows above the gap stay in the original region; the rows below move into a new region with its own copy of the plane.
- The tool switches back to Select.
Escapecancels without splitting.
Splitting doesn't change any routing. It's useful when part of a design should get its own plane (to move or rotate it separately in 3D) or its own length.